- Select Create > Polygon Primitives > Plane >
 .
.
- Select Edit > Reset Settings.
- Set the plane options as follows:
- Width: 10
- Height: 10
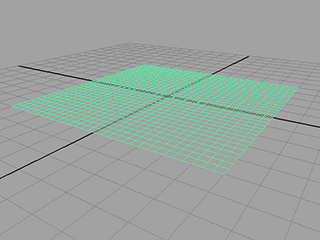
- Width divisions: 30
- Height divisions: 30
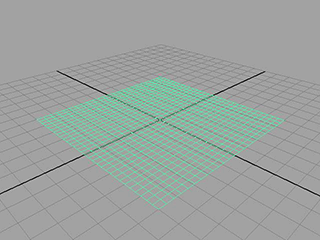
- Click Create.
Maya creates a plane centered at the origin.
- In the Polygons menu set, select Edit Mesh > Detach Component.
The plane will become separated such that each face becomes a new plane.
- Select all the planes.
- In the nDynamics menu set, select nMesh > Create nCloth.
- In the Attribute Editor, change the name of the nCloth to “Confetti.”
- In the Collisions section, turn Self Collide off.
- In the Dynamic Properties section, adjust the settings as follows:
- Stretch Resistance: 2
- Compression Resistance: 2
- Bend Resistance: 0
- Mass: 0.2
- Tangential Drag: 0.5
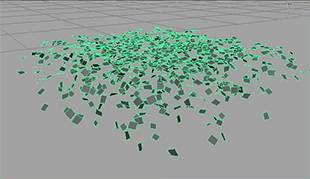
- Playback the nCloth simulation.
The cloth falls uniformly. To change this, you need to add turbulence.
Enhance the way the confetti falls
To add turbulence to the nCloth
- Go to the beginning of the playback range.
- Select the Confetti plane.
- In the nDynamics menu set select Fields > Turbulence > .
- Set the Turbulence options as follows:
- Magnitude: 1
- Attenuation: 0
- Frequency: 8
- Click Create.
- Set the End Time of the playback range to 100.
- Playback the simulation.
The simulation plays back more realistically, but also very slowly.
To improve the speed of the simulation
- Select the Confetti nCloth and open the Attribute Editor.
- In the nucleus1 tab set the Space Scale attribute to 0.1.
Maya has been treating the nCloth as a 10x10 meters object according the default dynamics settings. By setting the space scale to 0.1 the plane is now 1 meter square in terms of dynamics. This makes it simulate much faster.
You should now add the ground plane and some color.
To add a ground plane to the simulation
- Select the Confetti nCloth.
- In the Channel Box, set TranslateY to 30.
- In the Attribute Editor, select the nucleus1 tab.
- In the section Ground Plane, activate Use Plane.
-
 -click the nCloth and select Assign New Material from the pop-up menu that appears.
- In the right panel of the Assign New Material window, click
 .
.
- In the Attribute Editor, select the rampShader1 tab.
- In the Color section, select the checkered box next to Selected Color.
- Select Ramp.
- Change to Shaded and Textured mode (hotkey: 6).
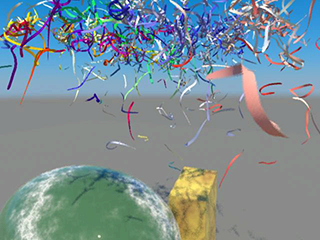
- Playback the simulation.
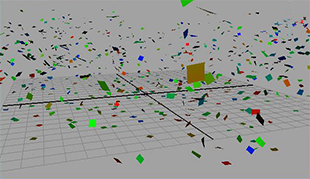
The confetti now glitters and falls as real confetti would. Now that you have a base simulation for your effect, you can perform a number of optional steps to enhance the simulation.
Customize the shape of confetti (optional)
You can create circular confetti using a very similar procedure.
- -click the Confetti nCloth and select Material Attributes.
The Attribute Editor opens with the rampShader1 tab selected.
- In the Transparency section, select the checkered box next to Selected Color.
- In the right panel of the Create Render Node window, click
 .
.
- In the Attribute Editor, under Ramp Attributes set Type to Circular Ramp.
- In the Ramp Attributes editor, click the box with an x at the center of the color ramp to eliminate the green marker.
- Select the small red circle at the bottom left of the color ramp. The colored box next to Selected Color should change.
- Click the colored box next to Selected Color.
- Select the color black and move your mouse off the Color Chooser to close it.
- Under Ramp Attributes, set Selected Position to 0.45.
- Select the small blue circle at the top left of the color ramp.
- Click the colored box next to Selected Color
- Select the color white and move your mouse off the Color Chooser to close it.
- Under Ramp Attributes, set Selected Position to 0.5.
- In the place2dTexture1 tab, under 2d Texture Placement Attributes set Repeat UV to 30, 30.
Now when you render the simulation the confetti appears as circles instead of squares.

* nCloth Streamers
You can use this procedure to generate streamers as well.
- Select File > New Scene.
- Select Create > Polygon Primitives > Plane > .
- Select Edit > Reset Settings.
- Set the plane options as follows:
- Width: 10
- Height: 10
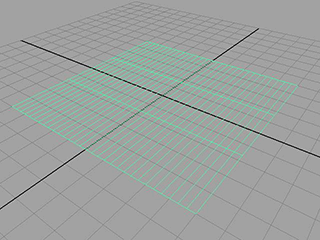
- Width divisions: 30
- Height divisions: 3
- Click Create.
Maya creates a plane centered at the origin.
- In the Polygons menu set, select Edit Mesh > Detach Component.
The plane separates such that each face becomes a piece of confetti.
- Select the plane and select Edit Mesh > Add Divisions.
Maya adds a number of divisions to the plane. These are used to allow the streamers to swirl and bend.
- In the Attribute Editor, select the polySubdFace1 tab.
- Set the following attributes:
- In the nDynamics menu set select nMesh > Create nCloth.
- In the Attribute Editor, change the nCloth’s name to “Streamers” and adjust the nCloth’s attribute values as follows:
- Self Collide: Off
- Mass: 0.2
- Tangential Drag: 0.5
- Stretch Resistance: 2
- Compression Resistance: 2
- Bend Resistance: 0
At this point you can add turbulence, color, and a ground plane exactly as you did for the confetti.
source : http://download.autodesk.com/global/docs/maya2013/en_us/index.html?url=files/Creating_nCloth_nCloth_Confetti.htm,topicNumber=d30e477670
'CGI > Maya' 카테고리의 다른 글
| MAYA "ANIM TO CURVE" SCRIPT (0) | 2012.09.12 |
|---|---|
| How to create falling leaves with randomly rotation (0) | 2012.08.09 |
| Emitter 2Rate PP (0) | 2012.08.08 |
| candle_set (0) | 2012.08.08 |
| layout UVs option (0) | 2012.07.27 |
